At the beginning of the project I wanted to achieve a lot. I set a high task, but in the end I am happy with the progress I made. After working out how to toon shade really helped me want to work harder, as I am a big fan of cell shaded games and animation.
I definitely made the wrong decision in going about how to set up my animation.m I think I was too worked up in the fact that everyone else was enclosing themselves in a room, and I didn't want to do the same. To improve, I should have used some objects the same colour as the background to guide me as I was going about. If I set these objects in a more linear fashion, I would have found the project a lot easier.
Overall I am pleased with my finished product, mainly because the camera work and toon shading worked well to establish a personality.
Thursday, July 15, 2010

Camera
Using the cameras was the hardest aspect for me. I tried to use them, but the way I set up my animation was very confusing and so I had one camera showing all the action instead of cutting to the next scene. I then decided to use more than one camera, and only one camera would work. To solve this, I had to parent the aim of the camera to the actual camera. This provided the solution, and using the cameras to create jump cuts for my animation worked.
Animation
Because of my decision to have my models all over the place and not into a contained room, animating was a lot of trouble for me. I animated the objects not in a straight line, but all ove the workspace. This was a problem, as after I had animated and worked out the timing, I would not remember the specific path. The eyeball was duplicated for some of the objects and so I had to remember which eyeball was the right order. This was very problematic.
Modelling the knife
To create the knife, I used the create polygon tool to draw out the shape of the knife and handle in the side view. I used this as a basis for my knife and after tweaking the shape, I extruded the knife.
EP Curve Tool
To create the goblet and vase, I used the EP Curve tool. This allowed me to draw a side view of the object and then revolve the line into a 3D model. This is a very good tool to make simple objects without spending unnecessary time modelling every part.


Toon Shading

I assumed cell shading would be a difficult task, but after experimenting with the toon shader I found out how easy it was. You model the object ,and then click on the toon shade option and select which variation you need. I opted for the three tone selection as it allowed for more subtle shading.
This is the first object I shaded, and I decided to use a similar style to the cartoon Viewtiful Joe, based on the cell shaded game of the smae name.


My Domino Effect
I have opted for the eyeball to be on top of the candle holder to begin with. A Bone will come flying and hit the eyeball and start the domino effect. The Eyeball will be knocked towards the gold goblet and then bounce off it and hit the vase. The pumpkin will be the next object the eyeball bounces off and then finally it will hit the knife, which spins out of control and cuts a piece of tin rope that the pin is attached to. The pin will go into the voodoo doll and end the animation.


Super Mario Galaxy 1 and 2
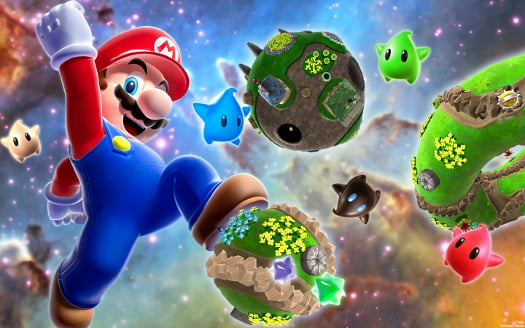
The Mario Galaxy series have been a big inspiration to me, as the games have taken away the necessity of being forced to walk on flat surfaces, instead taking Mario to whole new directions of playability.
Also, the physicality of the every object and the composition has been very eye opening. As I am choosing to do a huanted or spooky theme for my animation,the whole scattered composition of MArio Galaxy is a very good way of doing it. Through using the theme, I won't have to rely on realism, and floation objects on a vast array of black colour is justified.
Subscribe to:
Posts (Atom)
